Hack with a 1.99$ cheap BadUSB --- Digispark(ATTINY85)
BadUSB disguises itself as a human interface device(HID) such as keyboards or mice and covertly executes malicious commands or opens virus payloads on the target computer. We made a cheap BadUSB which costs less than 2$.
About BadUSB
What is BadUSB? In short, BadUSB disguises itself as a human interface device(HID) such as keyboards or mice and covertly executes malicious commands or opens virus payloads on the target computer. One of the terrible things is which takes control over the system using low-level debugging on a certain type of BIOSes.
Possible BadUSB Devices
- Keyboard;
- Network card;
- Mouse;
- USB charging cables
- USB sticks
- Anything can be inserted which can be miniaturized into a USB stick form factor.
What we need…
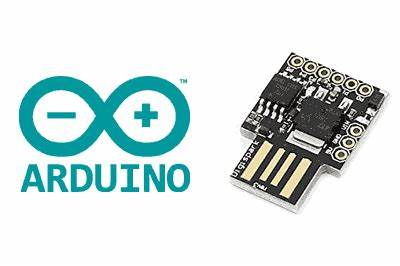
- Digispark(ATTINY85) Default - 16.5mhz
- Arduino IDE
Why use Digispark?
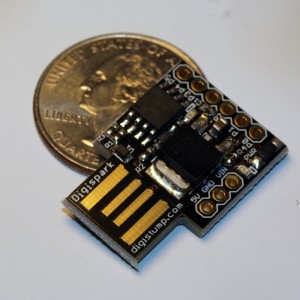
Digispark: The micro-sized, affordable, Arduino enabled, USB development board!
- Cheap, very cheap(1~2$)
- Tiny enough
- Item Weight: 3.53 ounces
- The size of a coin
- Easy to program, support Arduino
The Digispark is an ATtiny85 based microcontroller development board similar to the Arduino line, only cheaper, smaller, and a bit less powerful. With a whole host of shields to extend its functionality and the ability to use the familiar Arduino IDE the Digispark is a great way to jump into electronics, or perfect for when an Arduino is too big or too much.
Step 1: Configure bootloader(Windows)
The bootloader is the code that is pre-programmed on your Digispark and allows it to act as a USB device so that it can be programmed by the Arduino IDE.
You can download bootloader for Windows here(Github):
https://github.com/digistump/DigistumpArduino/releases/download/1.6.7/Digistump.Drivers.zip
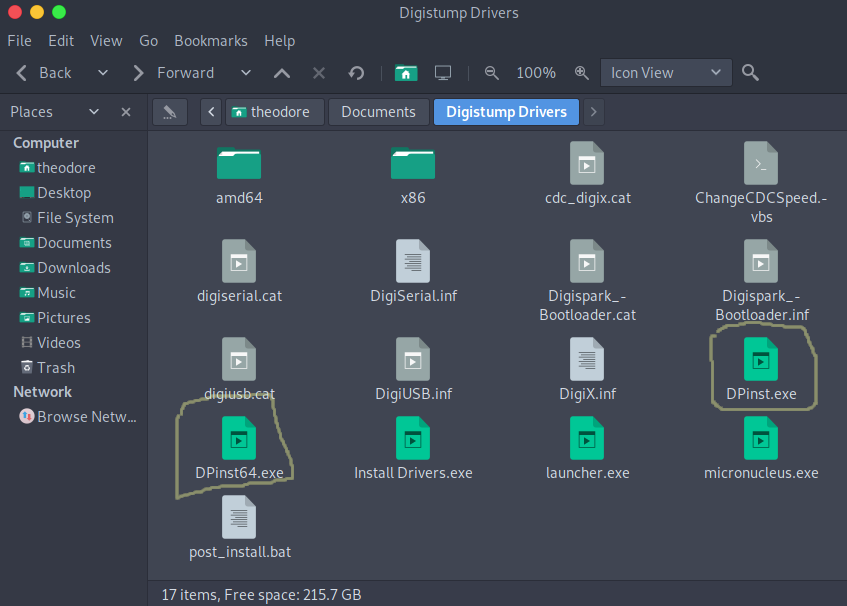
Double-click either DPinst64.exe on a 64-bit Windows computer, or DPinst.exe on a 32-bit Windows computer to install the Digispark drivers.
Step 2: Setup Arduino
Go to https://www.arduino.cc/en/Main/Software download installer. If you are using Linux, there are some more steps:
Install Arduino in Linux
Download the Linux 64 bits file for 64-bit Linux Intel systems or the Linux 32 bits file for Linux 32-bit Intel systems. Unzip the downloaded file, and extract the folder found in the zipped file to a convenient location. To run the Arduino IDE application, open the extracted folder and double-click the Arduino executable file. To install, run command sh install.sh.
Add Linux User Name to the Dialout Group
In order to be able to program any board from the Arduino IDE, the Linux user must be added to the dialout group.
$ sudo adduser $USER dialout
Enter your Linux password when prompted.
You will need to log out and then log back in, or reboot, for the changes to take effect.
Add udev Rules to the System
To be able to program the Digispark board from the Arduino IDE in Linux, udev rules must be added to the system. This is done by creating a file in /etc/udev/rules.d/ that contains the rules.
Create a text file called 49-micronucleus.rules in /etc/udev/rules.d/ and add the following rules to it(you will need root permission).
# UDEV Rules for Micronucleus boards including the Digispark.
# This file must be placed at:
#
# /etc/udev/rules.d/49-micronucleus.rules    (preferred location)
#   or
# /lib/udev/rules.d/49-micronucleus.rules    (req'd on some broken systems)
#
# After this file is copied, physically unplug and reconnect the board.
#
SUBSYSTEMS=="usb", ATTRS{idVendor}=="16d0", ATTRS{idProduct}=="0753", MODE:="0666"
KERNEL=="ttyACM*", ATTRS{idVendor}=="16d0", ATTRS{idProduct}=="0753", MODE:="0666", ENV{ID_MM_DEVICE_IGNORE}="1"
#
# If you share your linux system with other users, or just don't like the
# idea of write permission for everybody, you can replace MODE:="0666" with
# OWNER:="yourusername" to create the device owned by you, or with
# GROUP:="somegroupname" and mange access using standard unix groups.
Step 3: Add Digispark Package
- Run the Arduino application.
- In the Arduino application go to the “File” menu and select “Preferences”
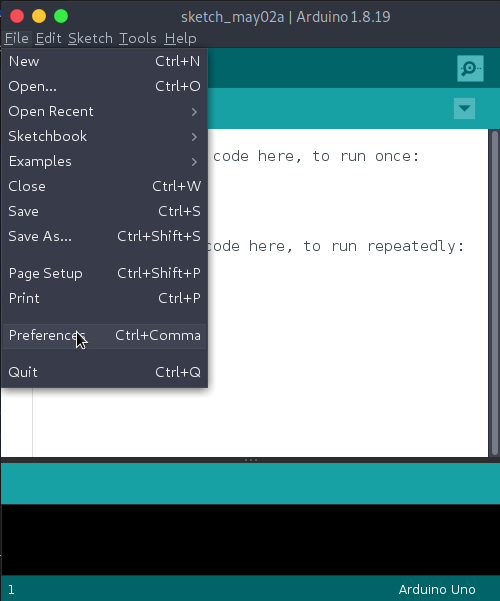
- In the box labeled “Additional Boards Manager URLs” enter:
http://digistump.com/package_digistump_index.json
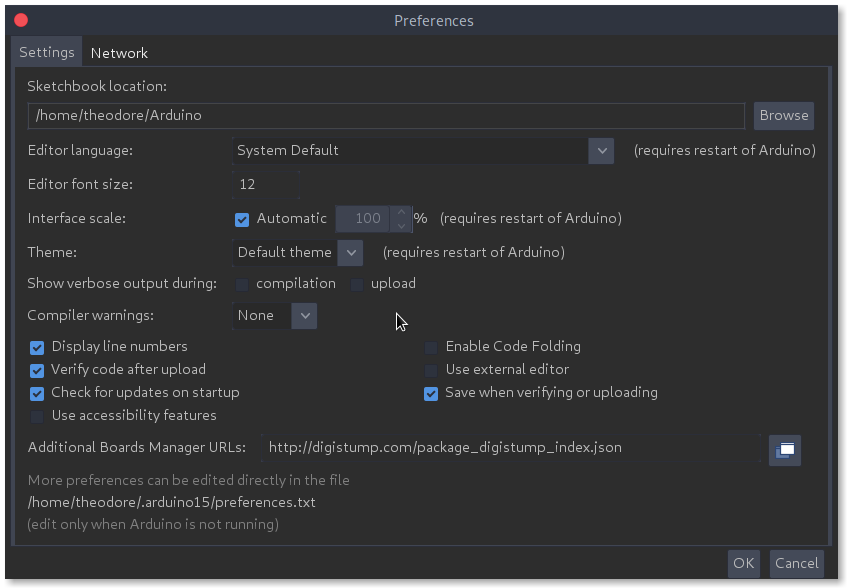
- Click OK
- Go to the “Tools” menu and then the “Board” submenu - select “Boards Manager” and then from the type drop down select “Contributed”
- Select the “Digistump AVR Boards” package and click the “Install” button.
- With the install complete, close the “Boards Manager” window and select the Digispark from the
Tools→Boardsmenu. SelectDigispark (Default - 16.5mhz).
Step 4: Programming the BadUSB
We should first program a sketch first, here’s a simple example:
//This DigiKeyboard Script opens a cmd window and echo 'Hello World!'

#include "DigiKeyboard.h"

void setup()
{
  DigiKeyboard.sendKeyStroke(KEY_R, MOD_GUI_LEFT);
  DigiKeyboard.delay(200);
  DigiKeyboard.println("cmd");
  DigiKeyboard.delay(200);
  DigiKeyboard.println("echo Hello World");
}

void loop()
{
  //empty
}
Then click Upload and insert the Digispark. Wait for the script to finish uploading. When the “Micronucleus done. Thank you!” message appears, it means that the script has finished uploading and you can unplug your BadUSB.
Some Scripts You may Need:
How to Defense?
- Egress filtering in Firewalls.
- Physically block USB Ports.
- Disable automatic installation of new USB devices.
More You may Wanna Know…
Digispark Pin Usage Guide
| Pin Number | Output Voltage | Analogue Port Number analogRead() | PWM | USB | Test LED | I2C | SPI* |
|---|---|---|---|---|---|---|---|
| 0 | 5V | Y - 504 Hz | Rev 1 | SDA | MISO | ||
| 1 | 5V | Y - 504 Hz | Rev 2 / 4 | MISO | |||
| 2 | 5V | 1 | SCL | SCK | |||
| 3 | 3.6V | 3 | Y - 1.5k Ohm to 5 V Zener diode (3.6 V maximum in- & output) | ||||
| 4 | 3.6V | 2 | Y - 1007 Hz | Y Zener diode (3.6 V maximum in- & output) | |||
| 5 | 3V | 0 |
*Note that the labeling of the pins for SPI is somewhat misleading. The table above is correct, as MISO is actually DI and MOSI is DO, but for use with ISP MISO and MOSI are swapped.
Digispark Pro Pin Usage Guide
This table details the function of each pin on the Digispark Pro and any notes the are relevant.
| Pin Number | Output Voltage | ADC | PWM | |
|---|---|---|---|---|
| VCC | VCC | 5v | ||
| SDA | 0 SDA | 5v | Y | |
| LED | 1 LED | 5v | Y | |
| SCL | 2 SCL | 5v | Y | |
| USB+ | 3 USB+ | 5v | A3 | Y |
| USB- | 4 USB- | 5v | Y | |
| Pin 5 | 5 | 5v | A5 | Y |
| GND | GND | 0v | ||
| VIN | VIN(6-16v) | |||
| RX | 6 RX | 5v | A6 | |
| TX | 7 TX | 5v | A7 | |
| MISO | 8 MISO | 5v | A8 | Y |
| INT1 | 9 INT1 | 5v | A9 | |
| MOSI | 10 MOSI | 5v | A10 | |
| SCK | 11 SCK | 5v | A11 | |
| SS | 12 SS | 5v | A12 | |
| RST | RST | |||
| VIN | VIN(6-16v) | |||
| GND | GND | 0v | ||
| VCC | VCC | 5v |
PWM
https://digistump.com/wiki/digispark/tutorials/propwm
LEGAL NOTICE
THESE SOFTWARES AND SCRIPTS ARE PROVIDED FOR EDUCATIONAL USE ONLY! IF YOU ENGAGE IN ANY ILLEGAL ACTIVITY WE DO NOT TAKE ANY RESPONSIBILITY FOR IT. BY USING THESE SOFTWARES AND SCRIPTS YOU AGREE WITH THESE TERMS.